
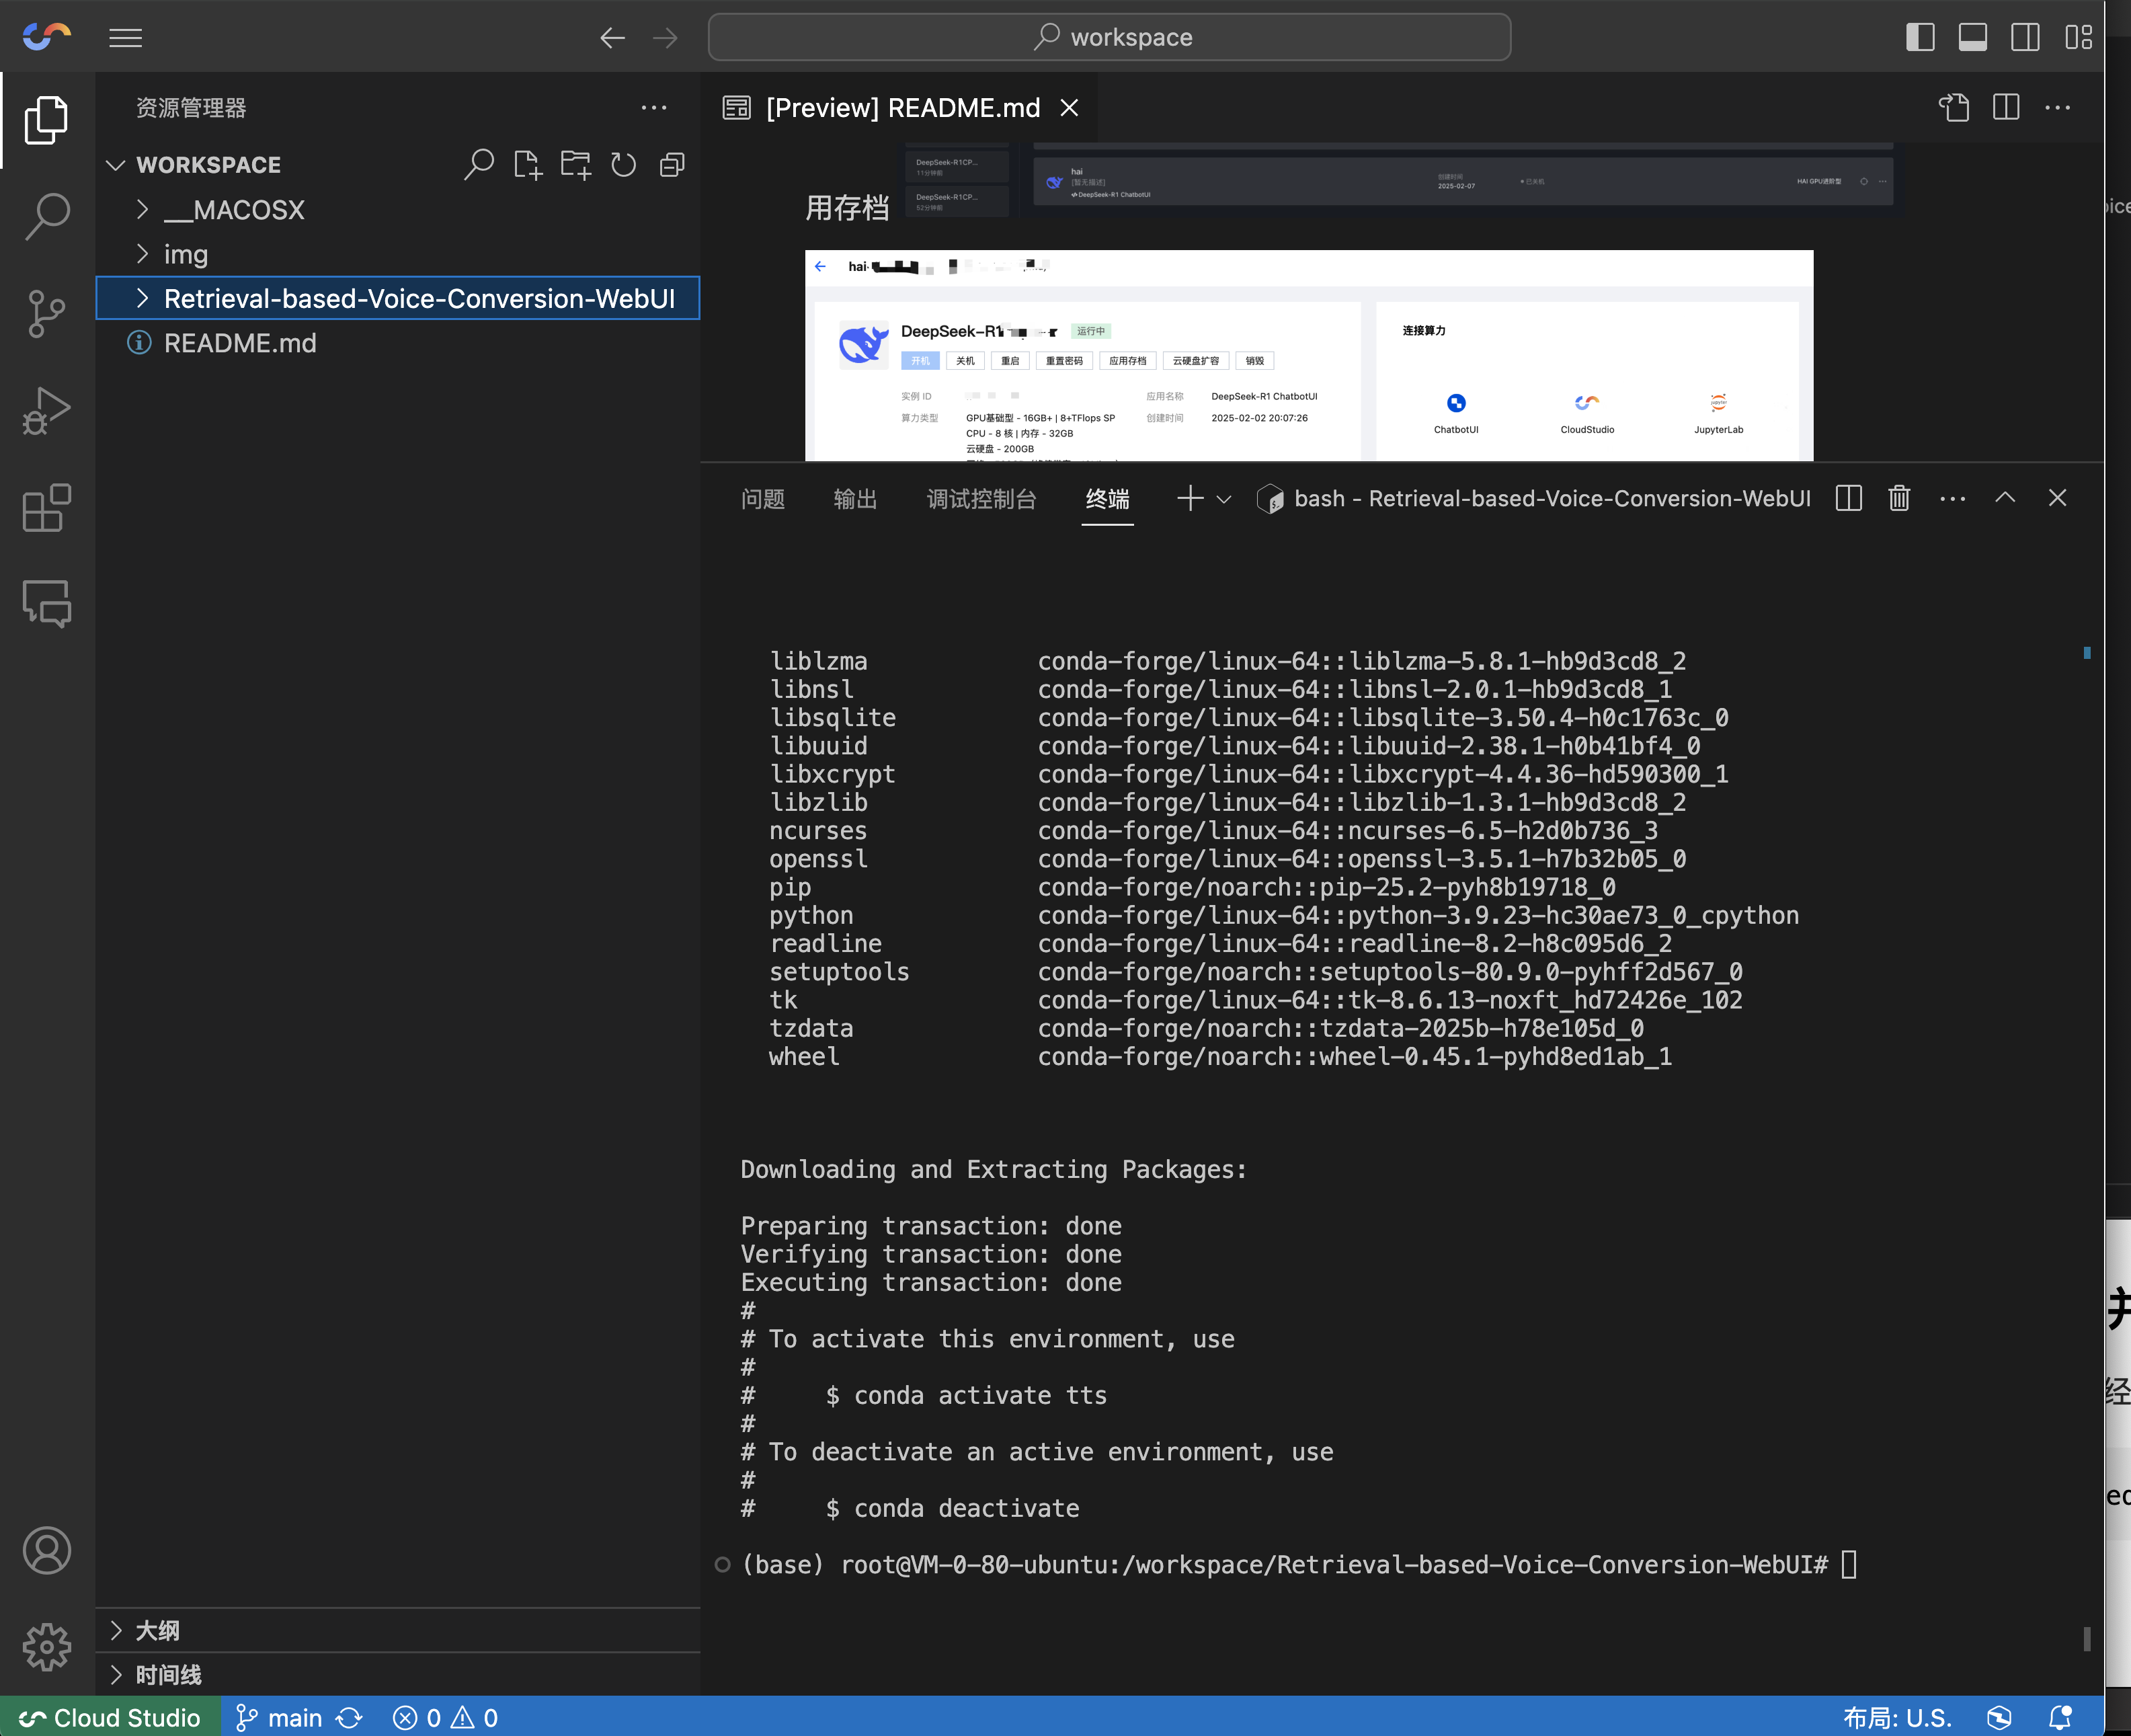
Demo
Here is an AI-generated song cover created using this service:
Prerequisites
You need a Tencent Cloud account. If you don't have one, you can register for free. You can use your WeChat account to scan the QR code for easy registration and login. Registration URL: https://cloud.tencent.com/login?s_url=https%3A%2F%2Fcloud.tencent.com%2F
Overview
This method utilizes the 10,000 free minutes of CloudStudio service provided by Tencent Cloud every month. We will set up and run the VITS project environment in the cloud to achieve AI voice cloning and AI song covers.
You can also use this service to build other AI applications. The provided cloud environment is equipped with an NVIDIA T4 GPU with 16GB of VRAM, offering decent performance for various tasks.
Step-by-Step Guide
Create a Cloud Studio Environment
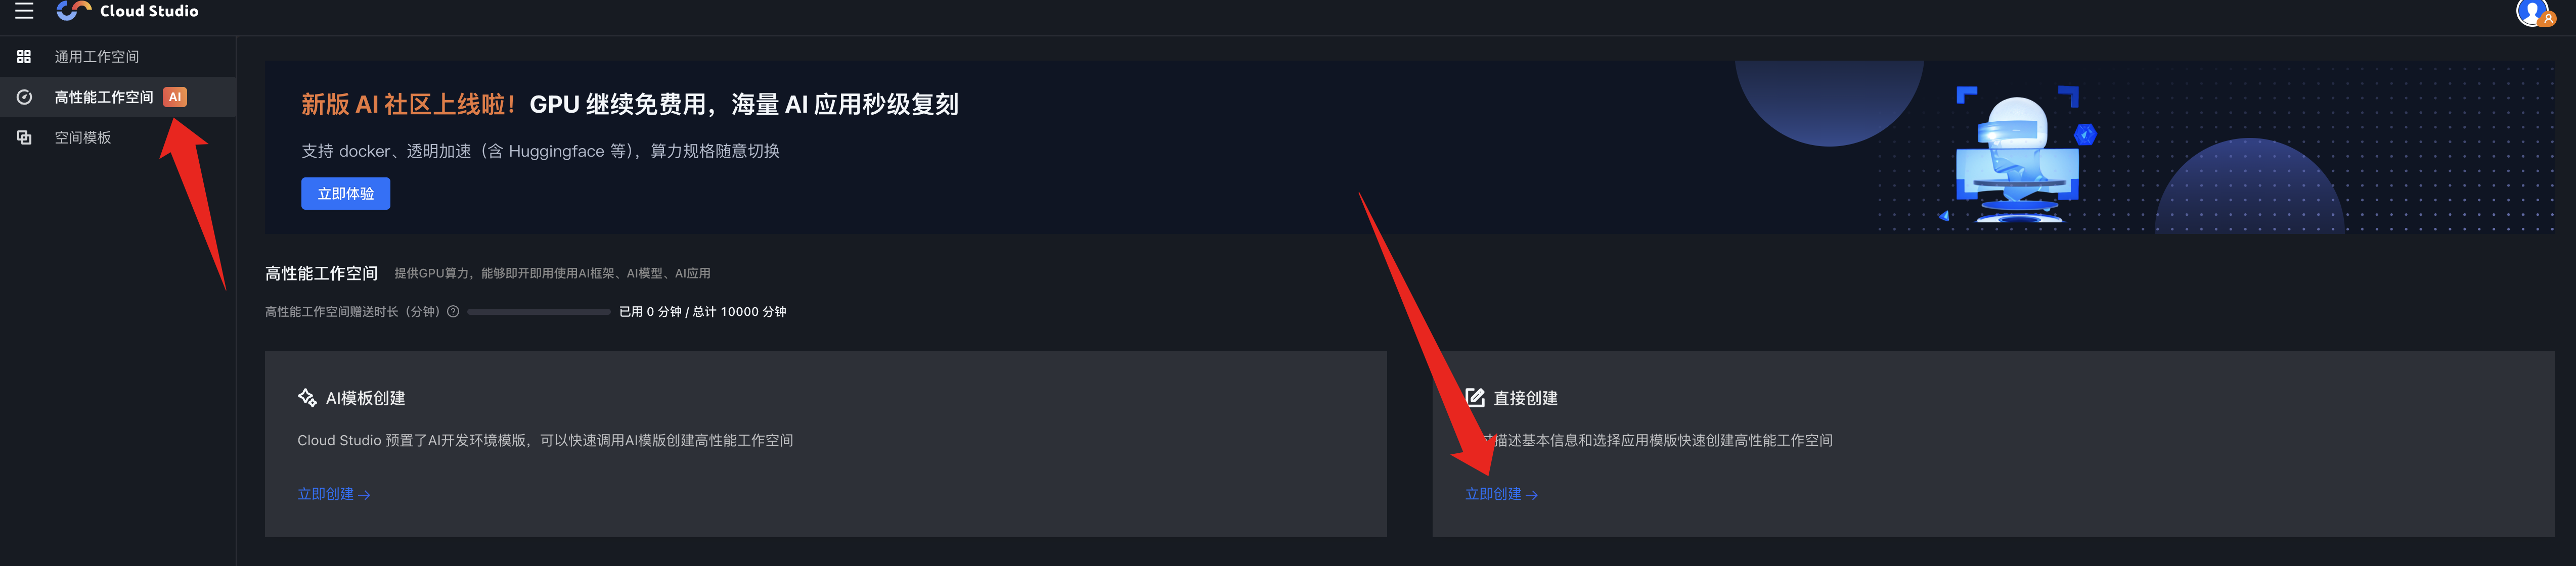
Open the Tencent Cloud Studio page: https://ide.cloud.tencent.com/dashboard/gpu-workspace
After logging in, select "High-Performance Workspace" from the right-side menu and then choose to create one directly.
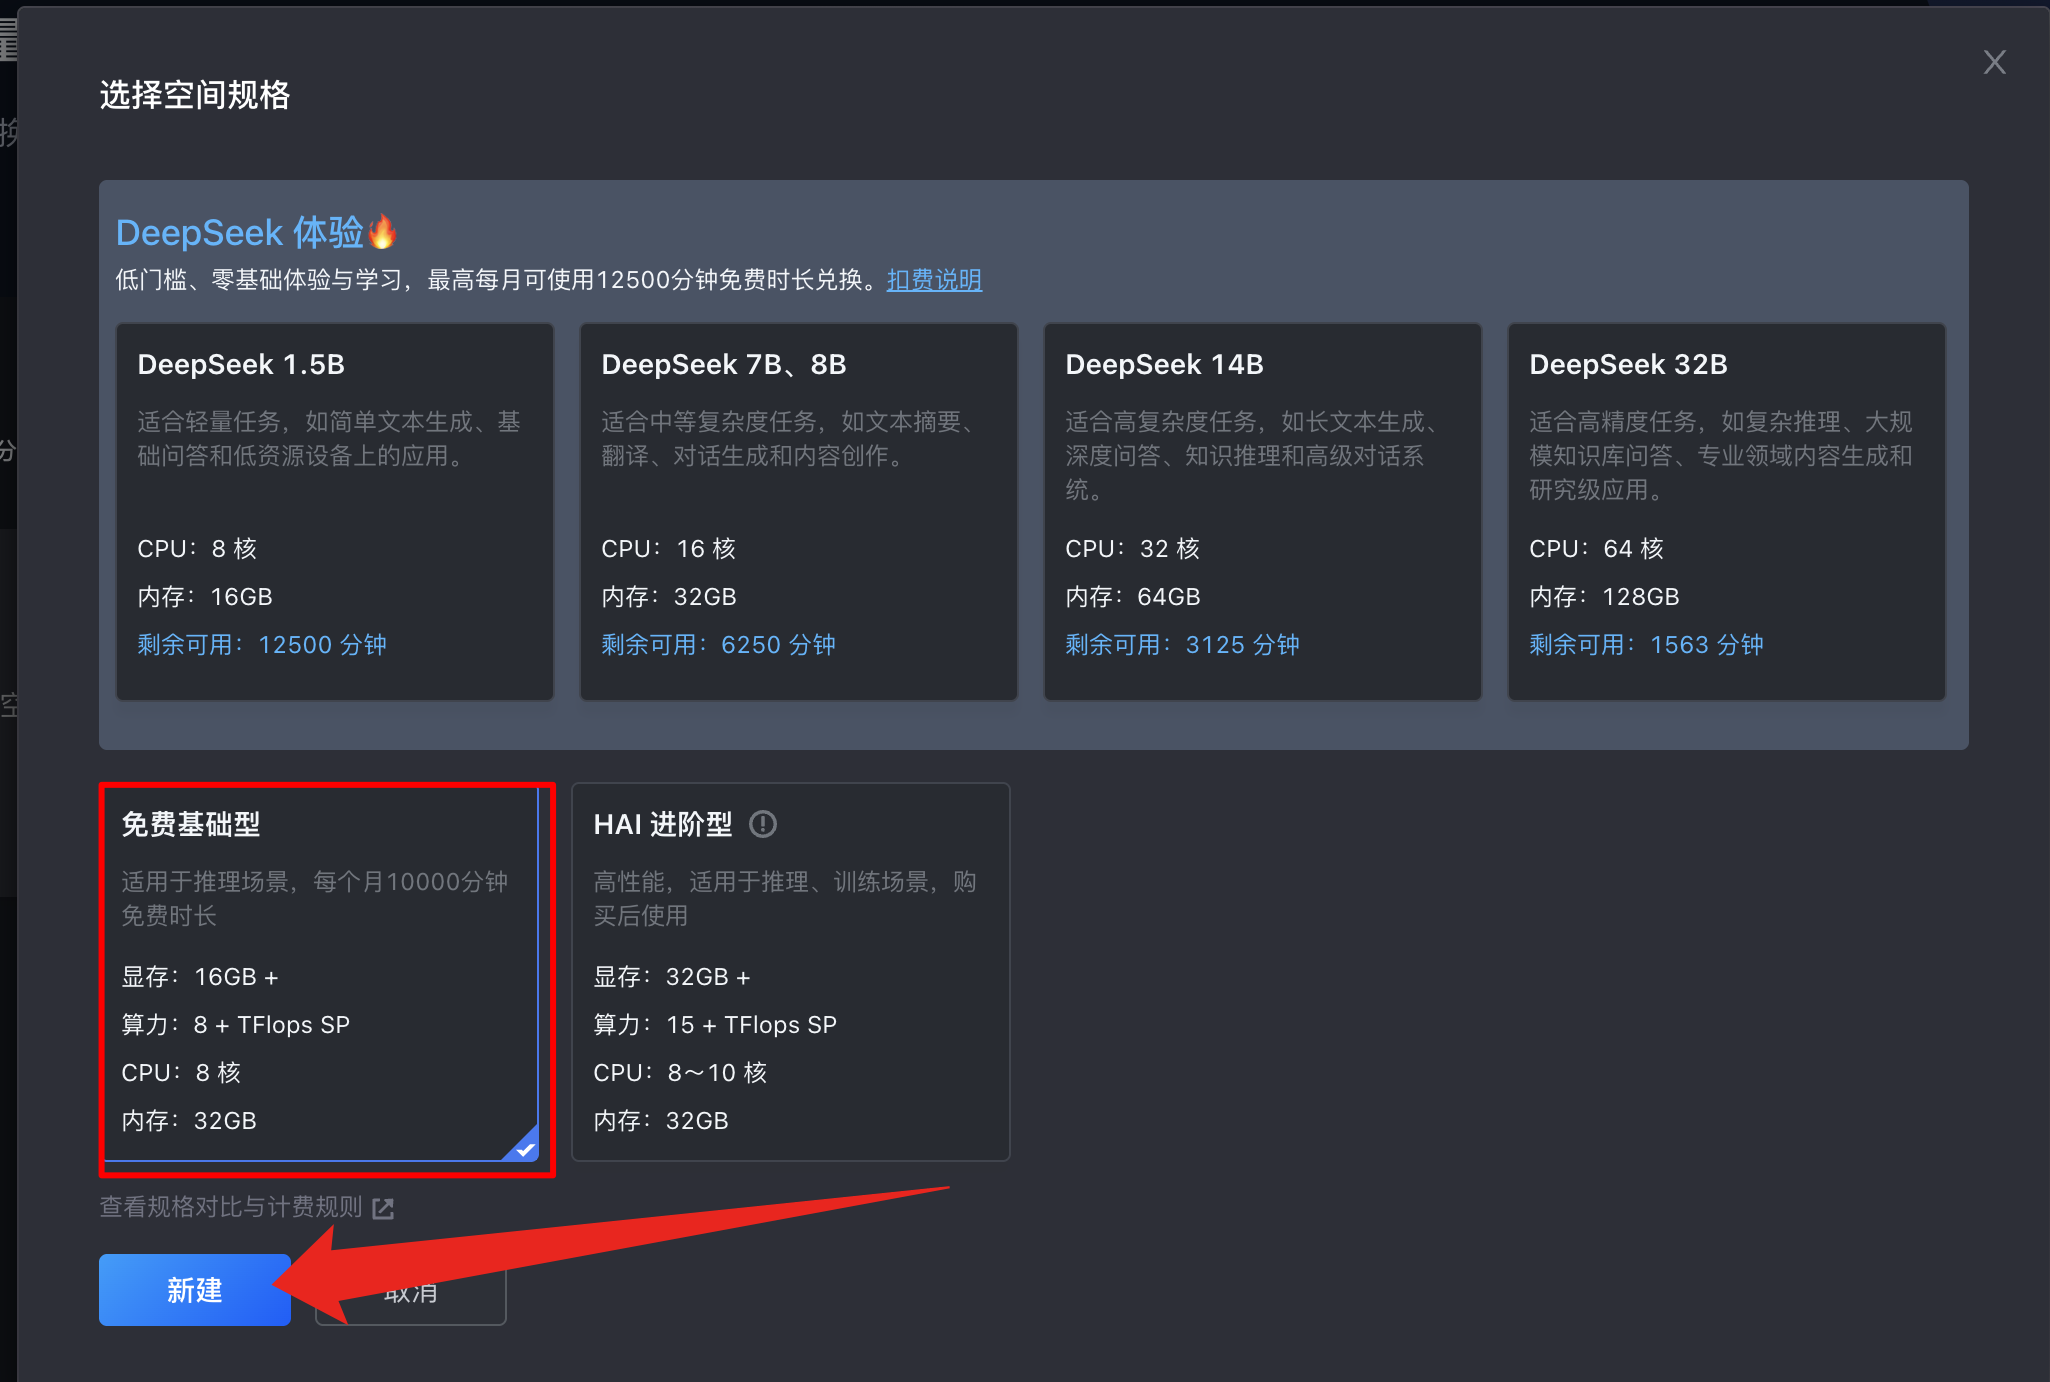
Select the "Free Basic" plan and click "New".
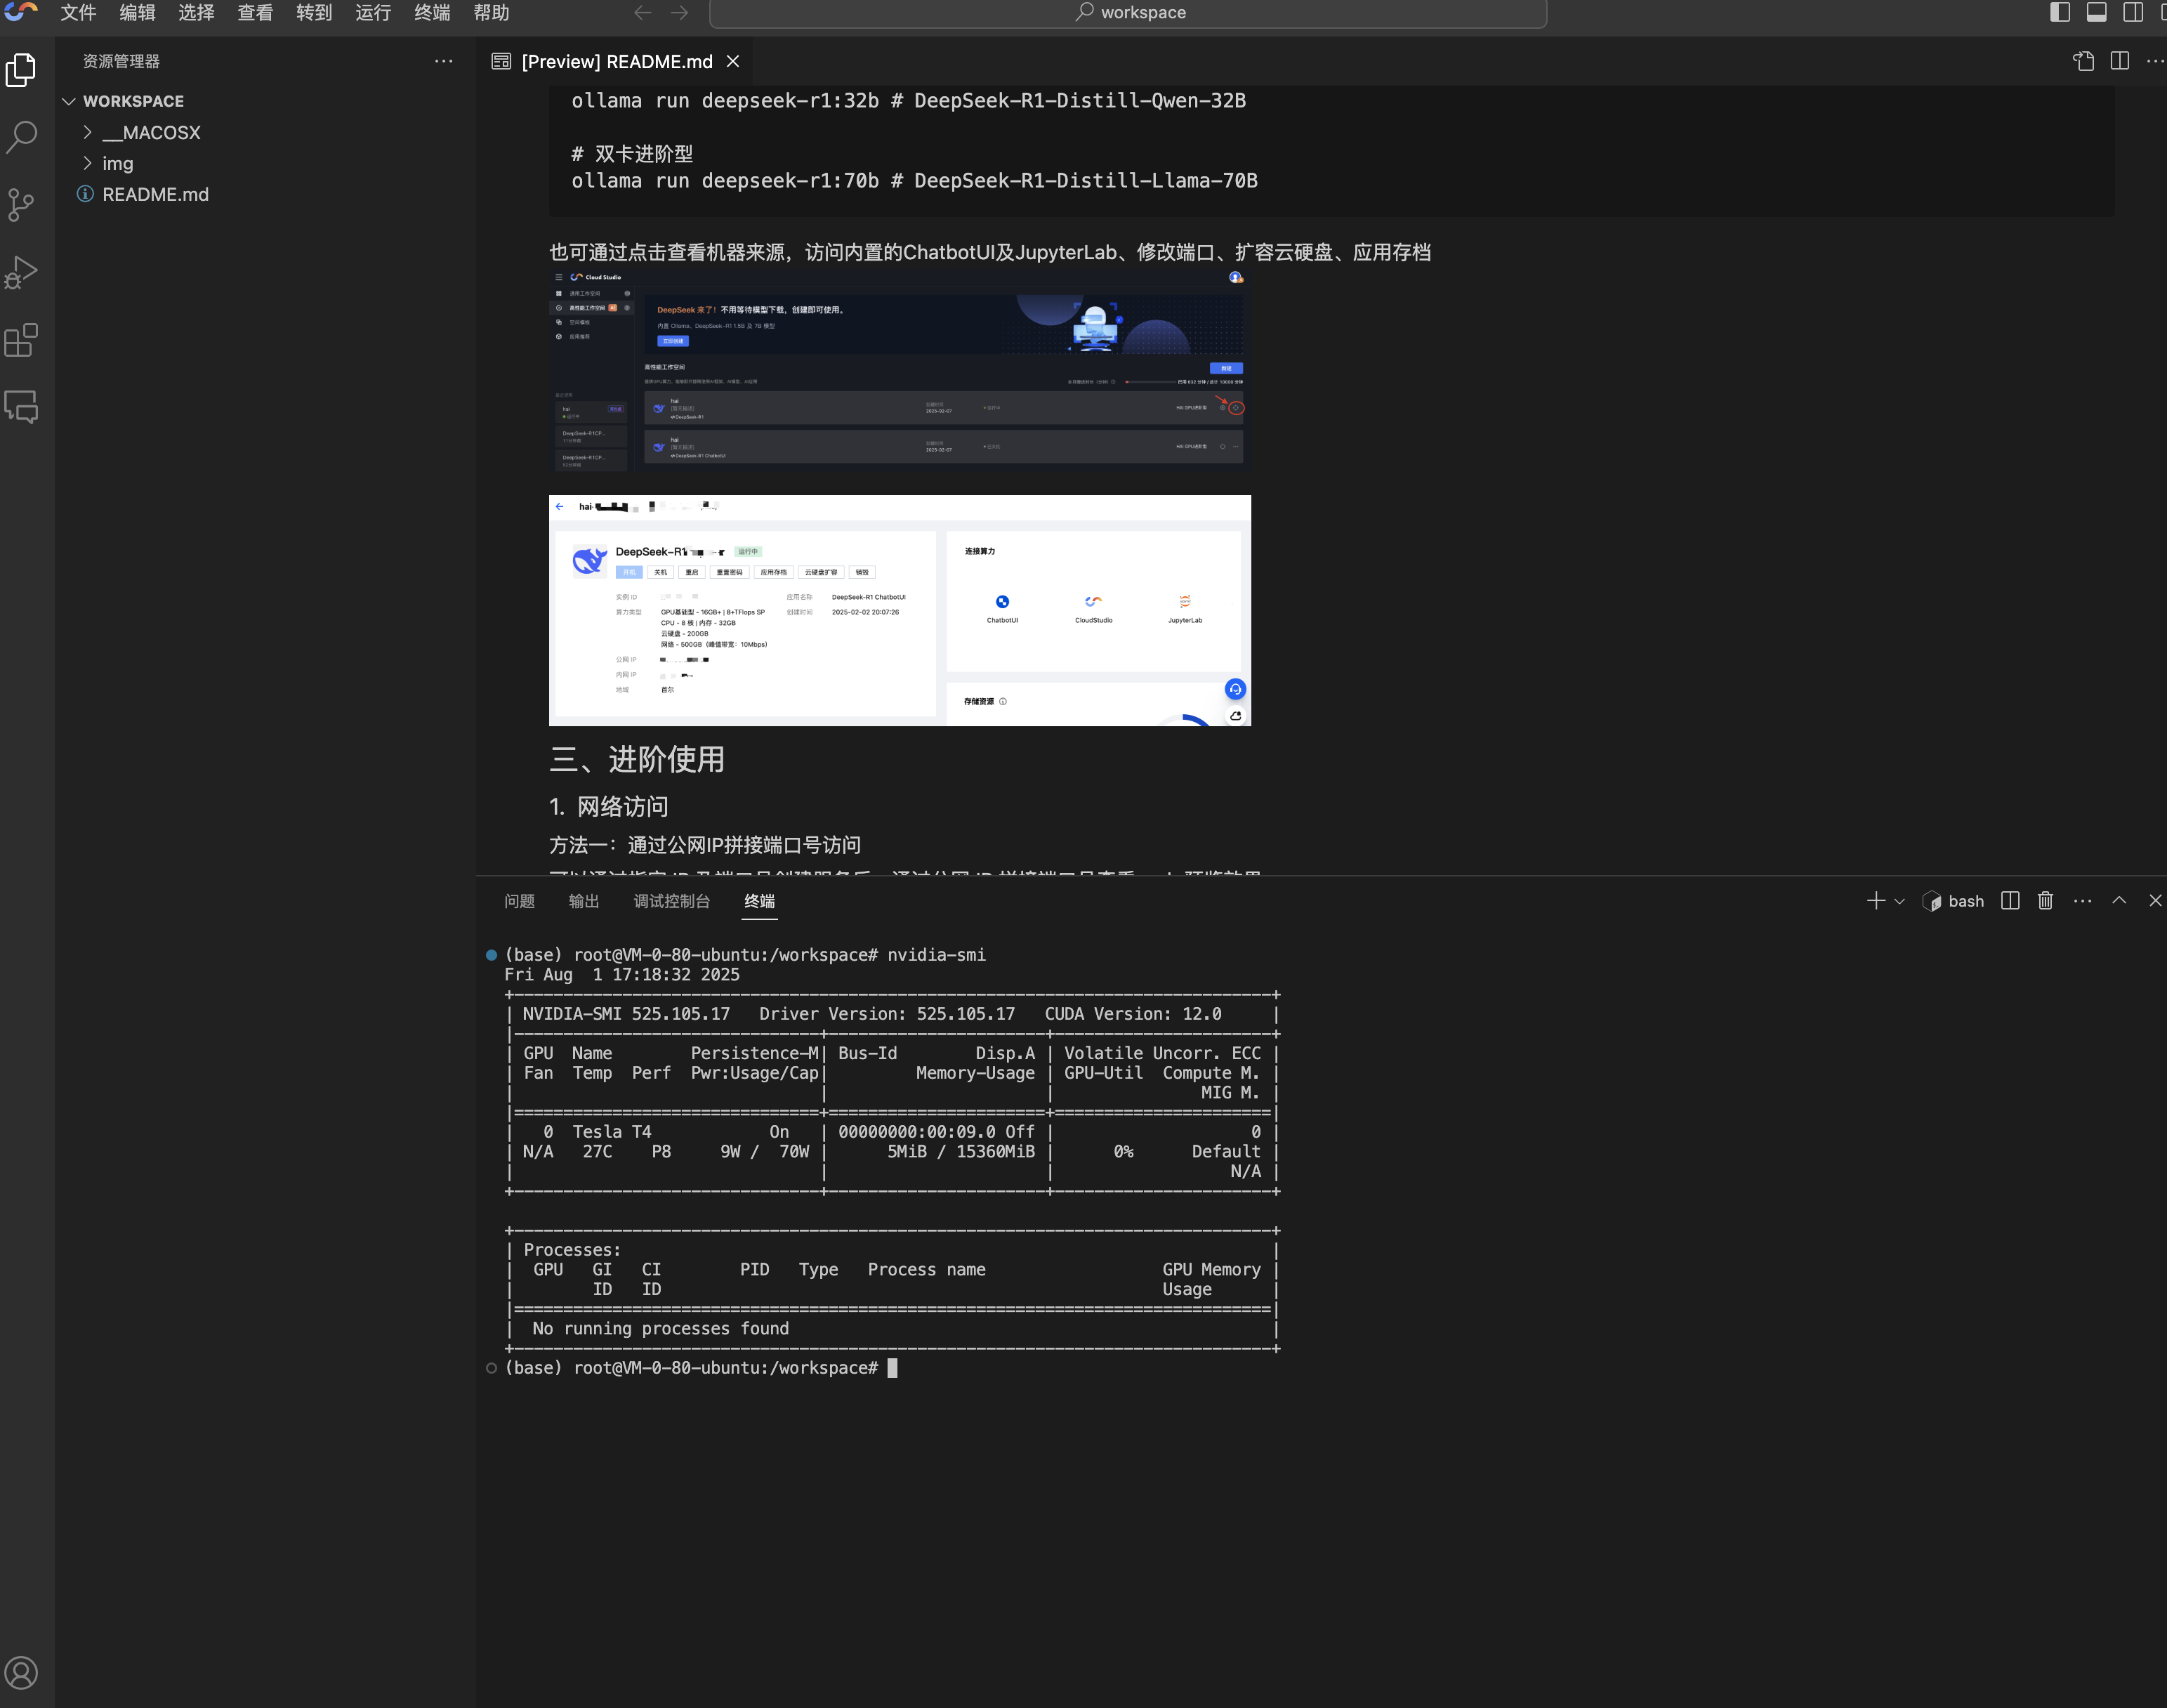
Creating the new space will take a few minutes. Once it's ready, click to enter the cloud environment. It's a web-based VS Code interface. Use Command + J on Mac or Ctrl + J on Windows to open the terminal.
Clone the Retrieval-based-Voice-Conversion-WebUI Project
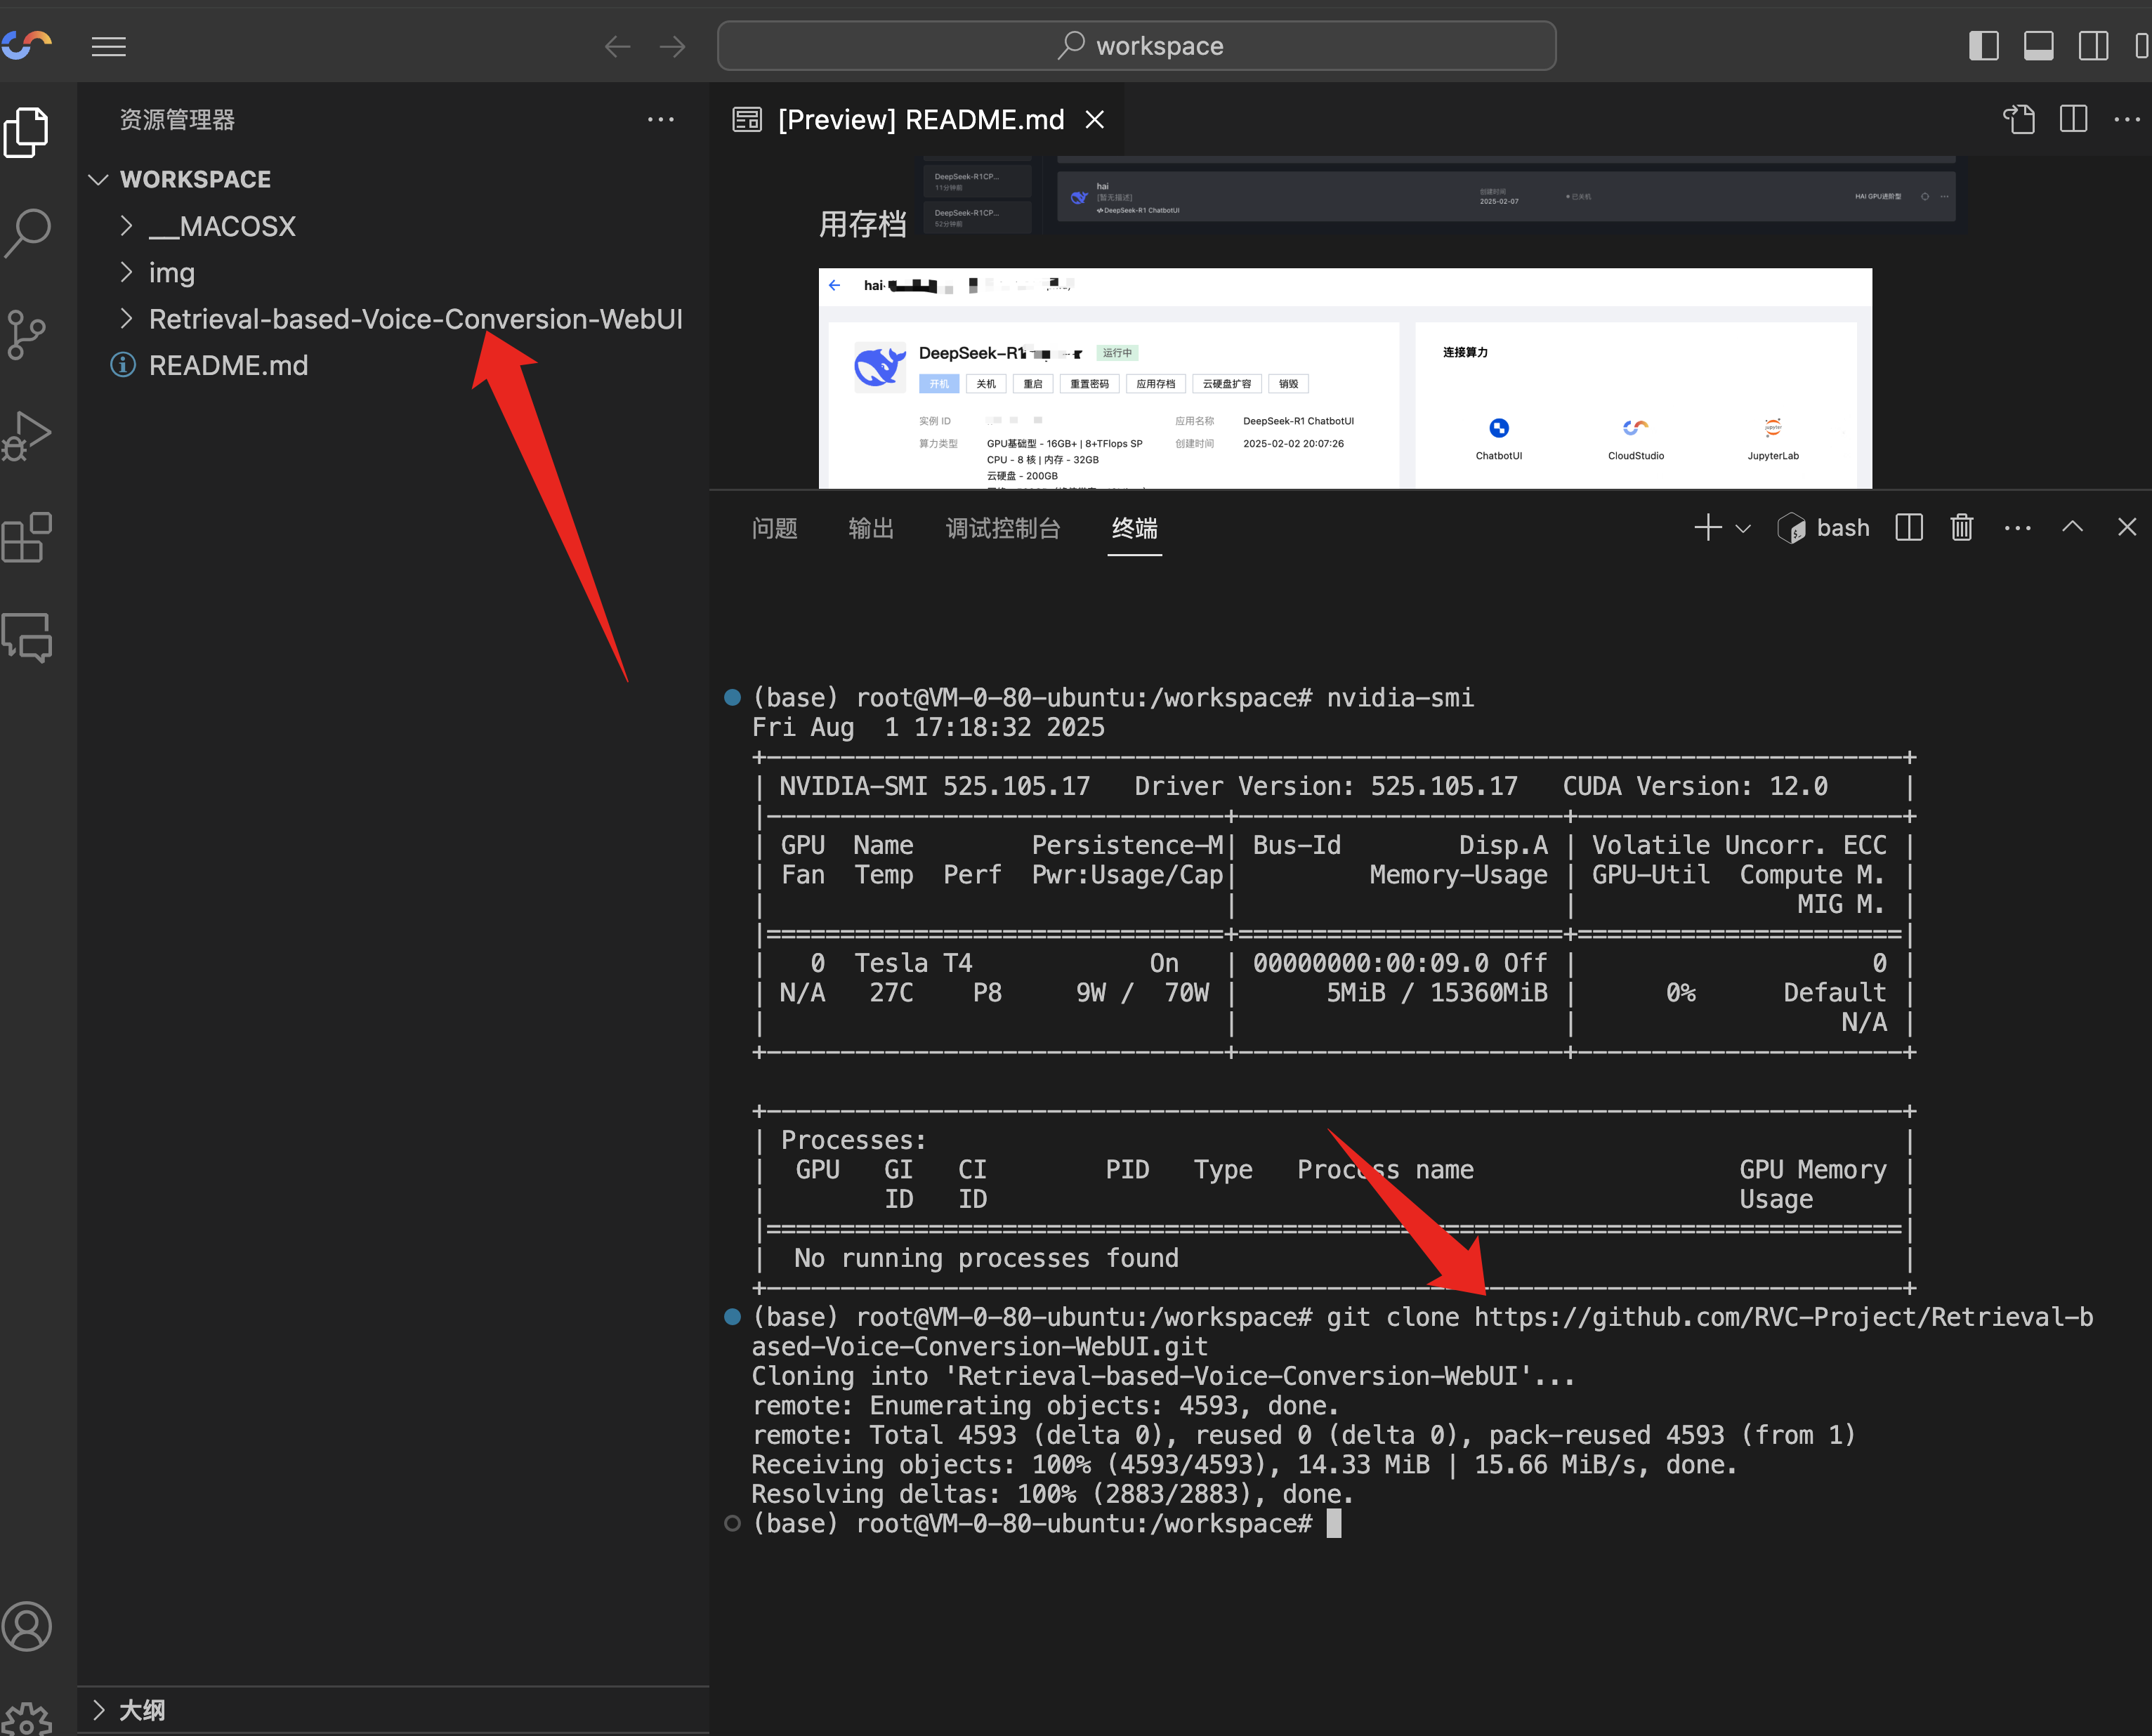
You can choose other AI voice cloning projects like GPT-SoVITS or CosyVoice. Here, we will use Retrieval-based-Voice-Conversion-WebUI. Clone the project by entering the following command in the terminal:
git clone https://github.com/RVC-Project/Retrieval-based-Voice-Conversion-WebUI.git
After cloning, you will see the project files in the left-side file tree.
Create Project Environment and Install Dependencies
CloudStudio comes with Conda pre-installed, so you can directly create a Python 3.9 environment:
cd Retrieval-based-Voice-Conversion-WebUI/ && conda create --name tts python=3.9 -y
After the environment is created, activate it and install the project dependencies:
## Activate the environment
conda activate tts
## Install poetry
pip install poetry
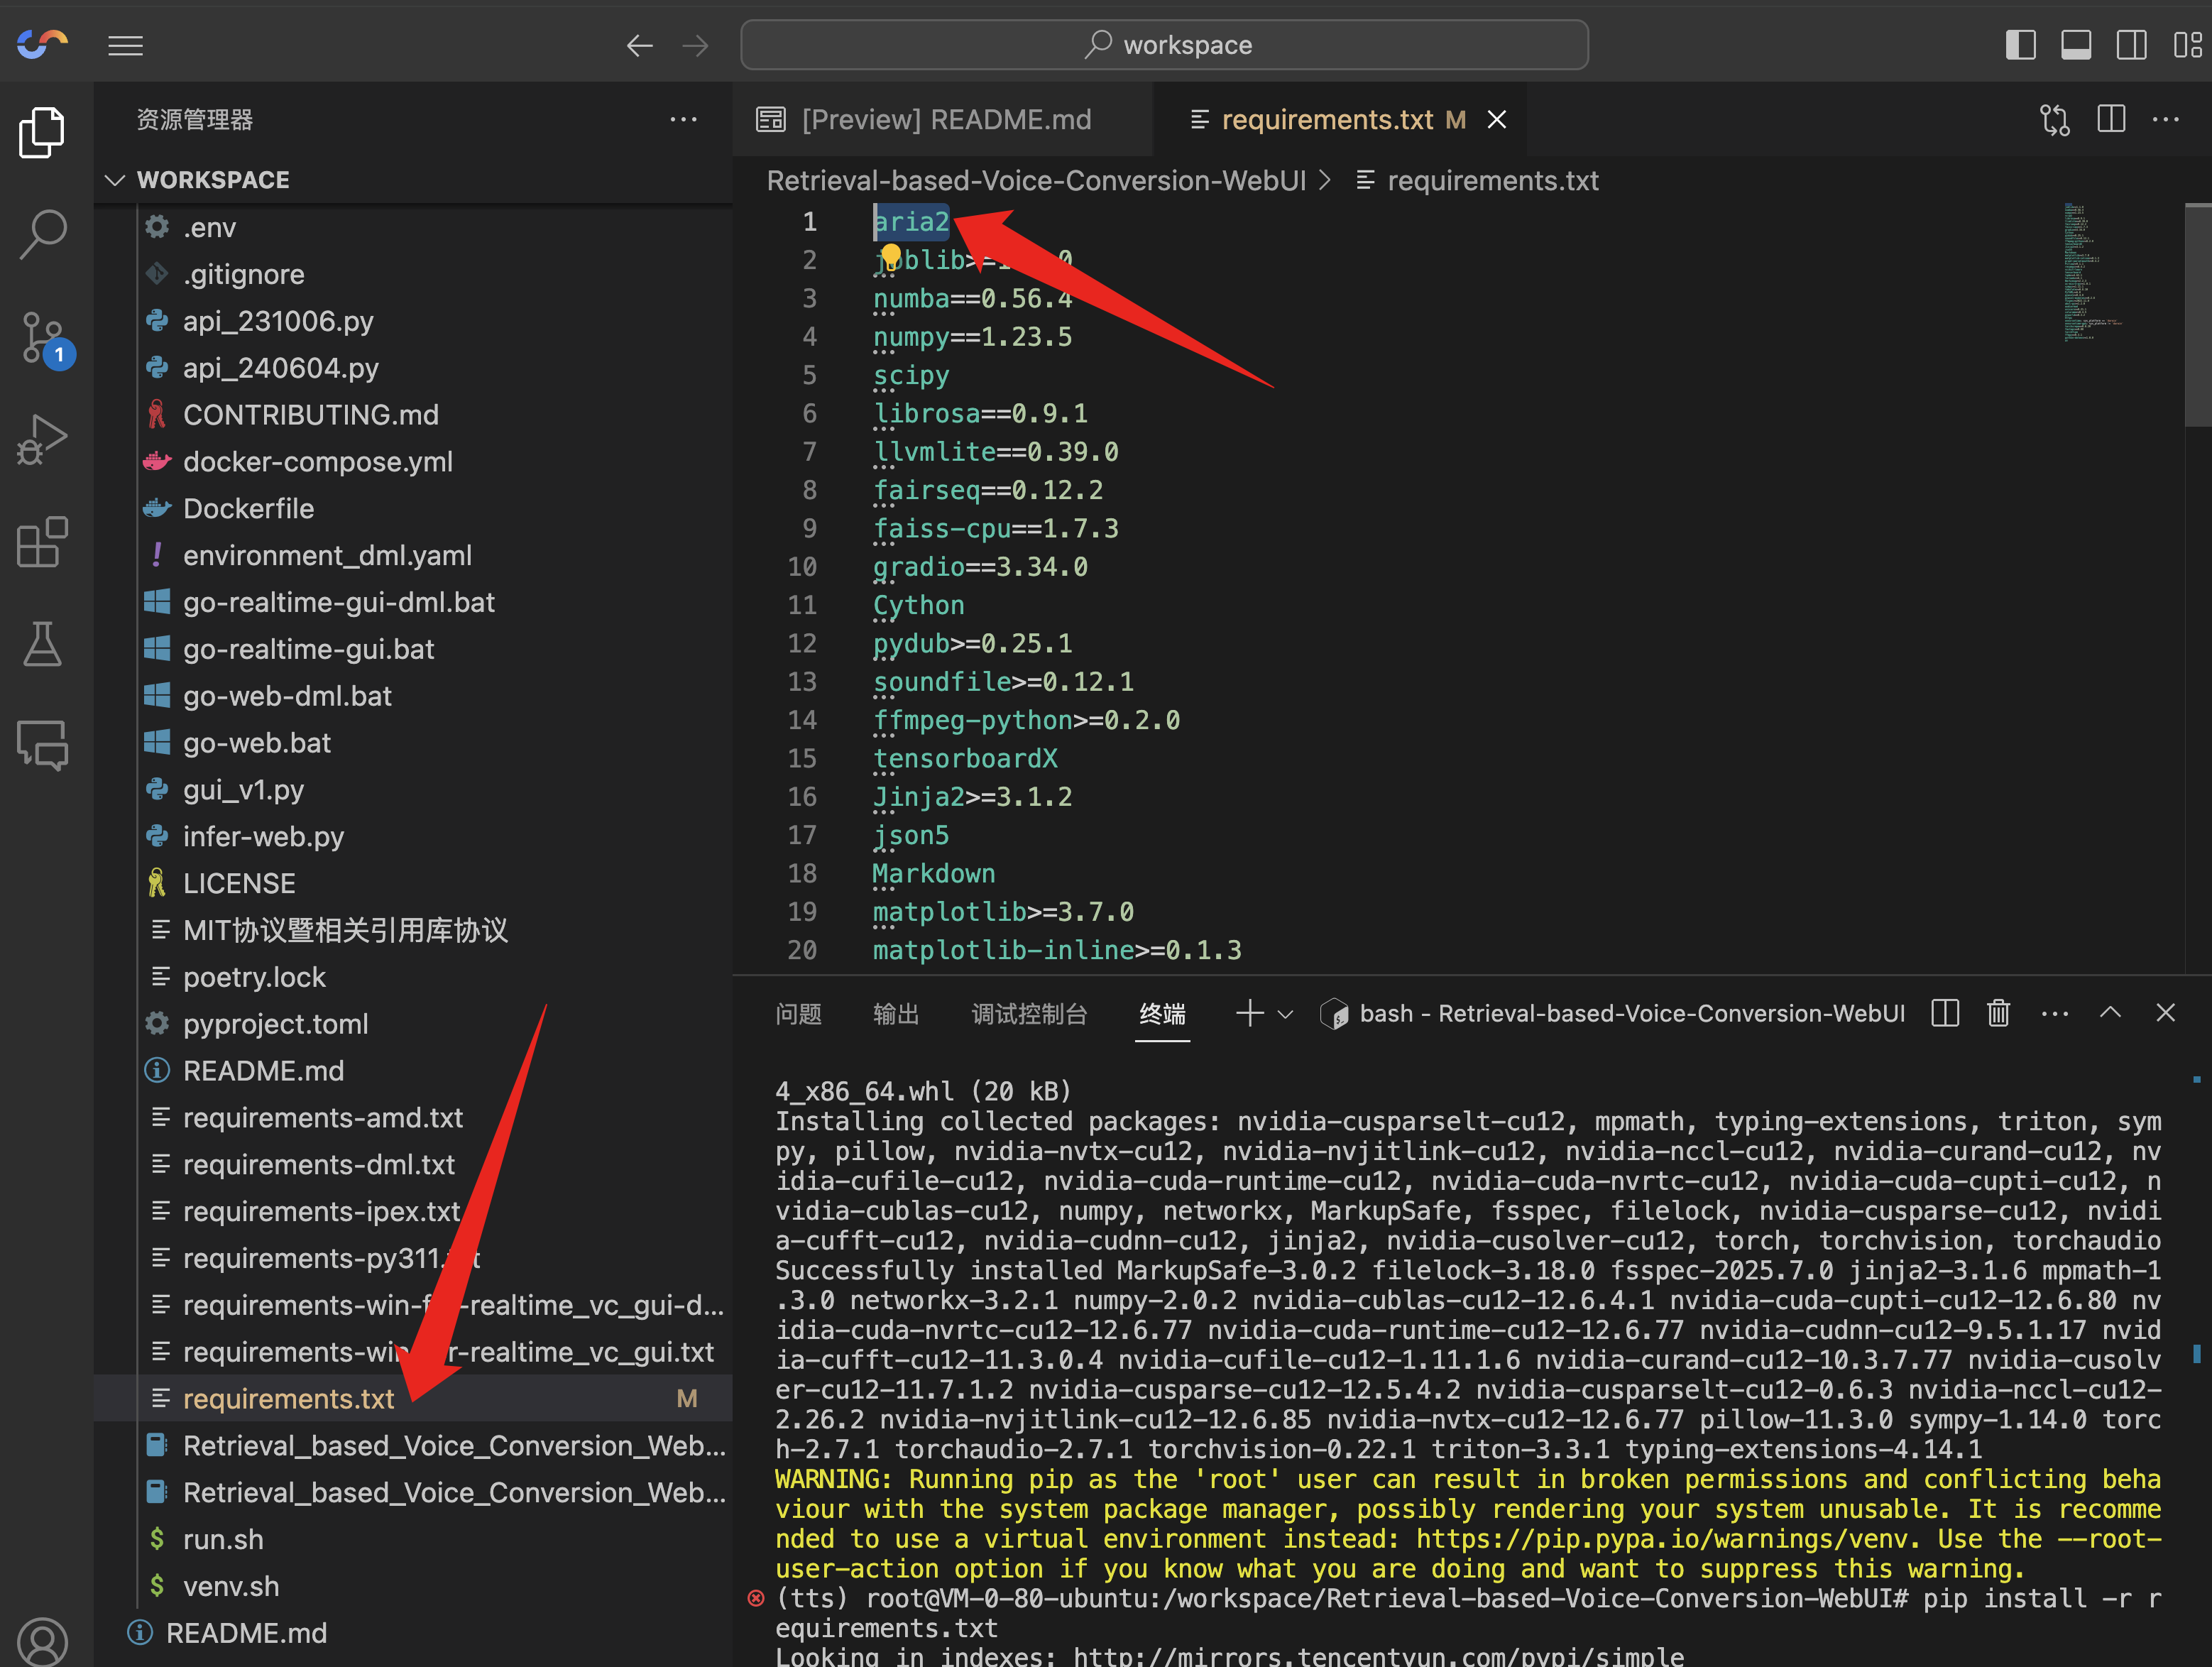
Modify the requirements.txt file to remove aria2:
Then, install the project dependencies and PyTorch:
## Downgrade pip to avoid dependency conflicts
poetry run pip install "pip<24.1"
## Install project dependencies
poetry run pip install -r requirements.txt
## Install PyTorch and its core dependencies
poetry run pip install torch torchvision torchaudio
Download Model Files
Once the dependencies are installed, download the required model files by running the following command:
cd tools && python download_models.py
The terminal will output 'All models downloaded!' when the download is complete.
Install ffmpeg
Execute the following command to install ffmpeg for audio processing:
apt update && apt install ffmpeg -y
Run the Project
With the environment set up, the final step is to run the project. Since the CloudStudio environment does not provide a public IP, we need to use a tunneling service to expose the project's port to the internet. The project uses Gradio, which has a built-in sharing feature.
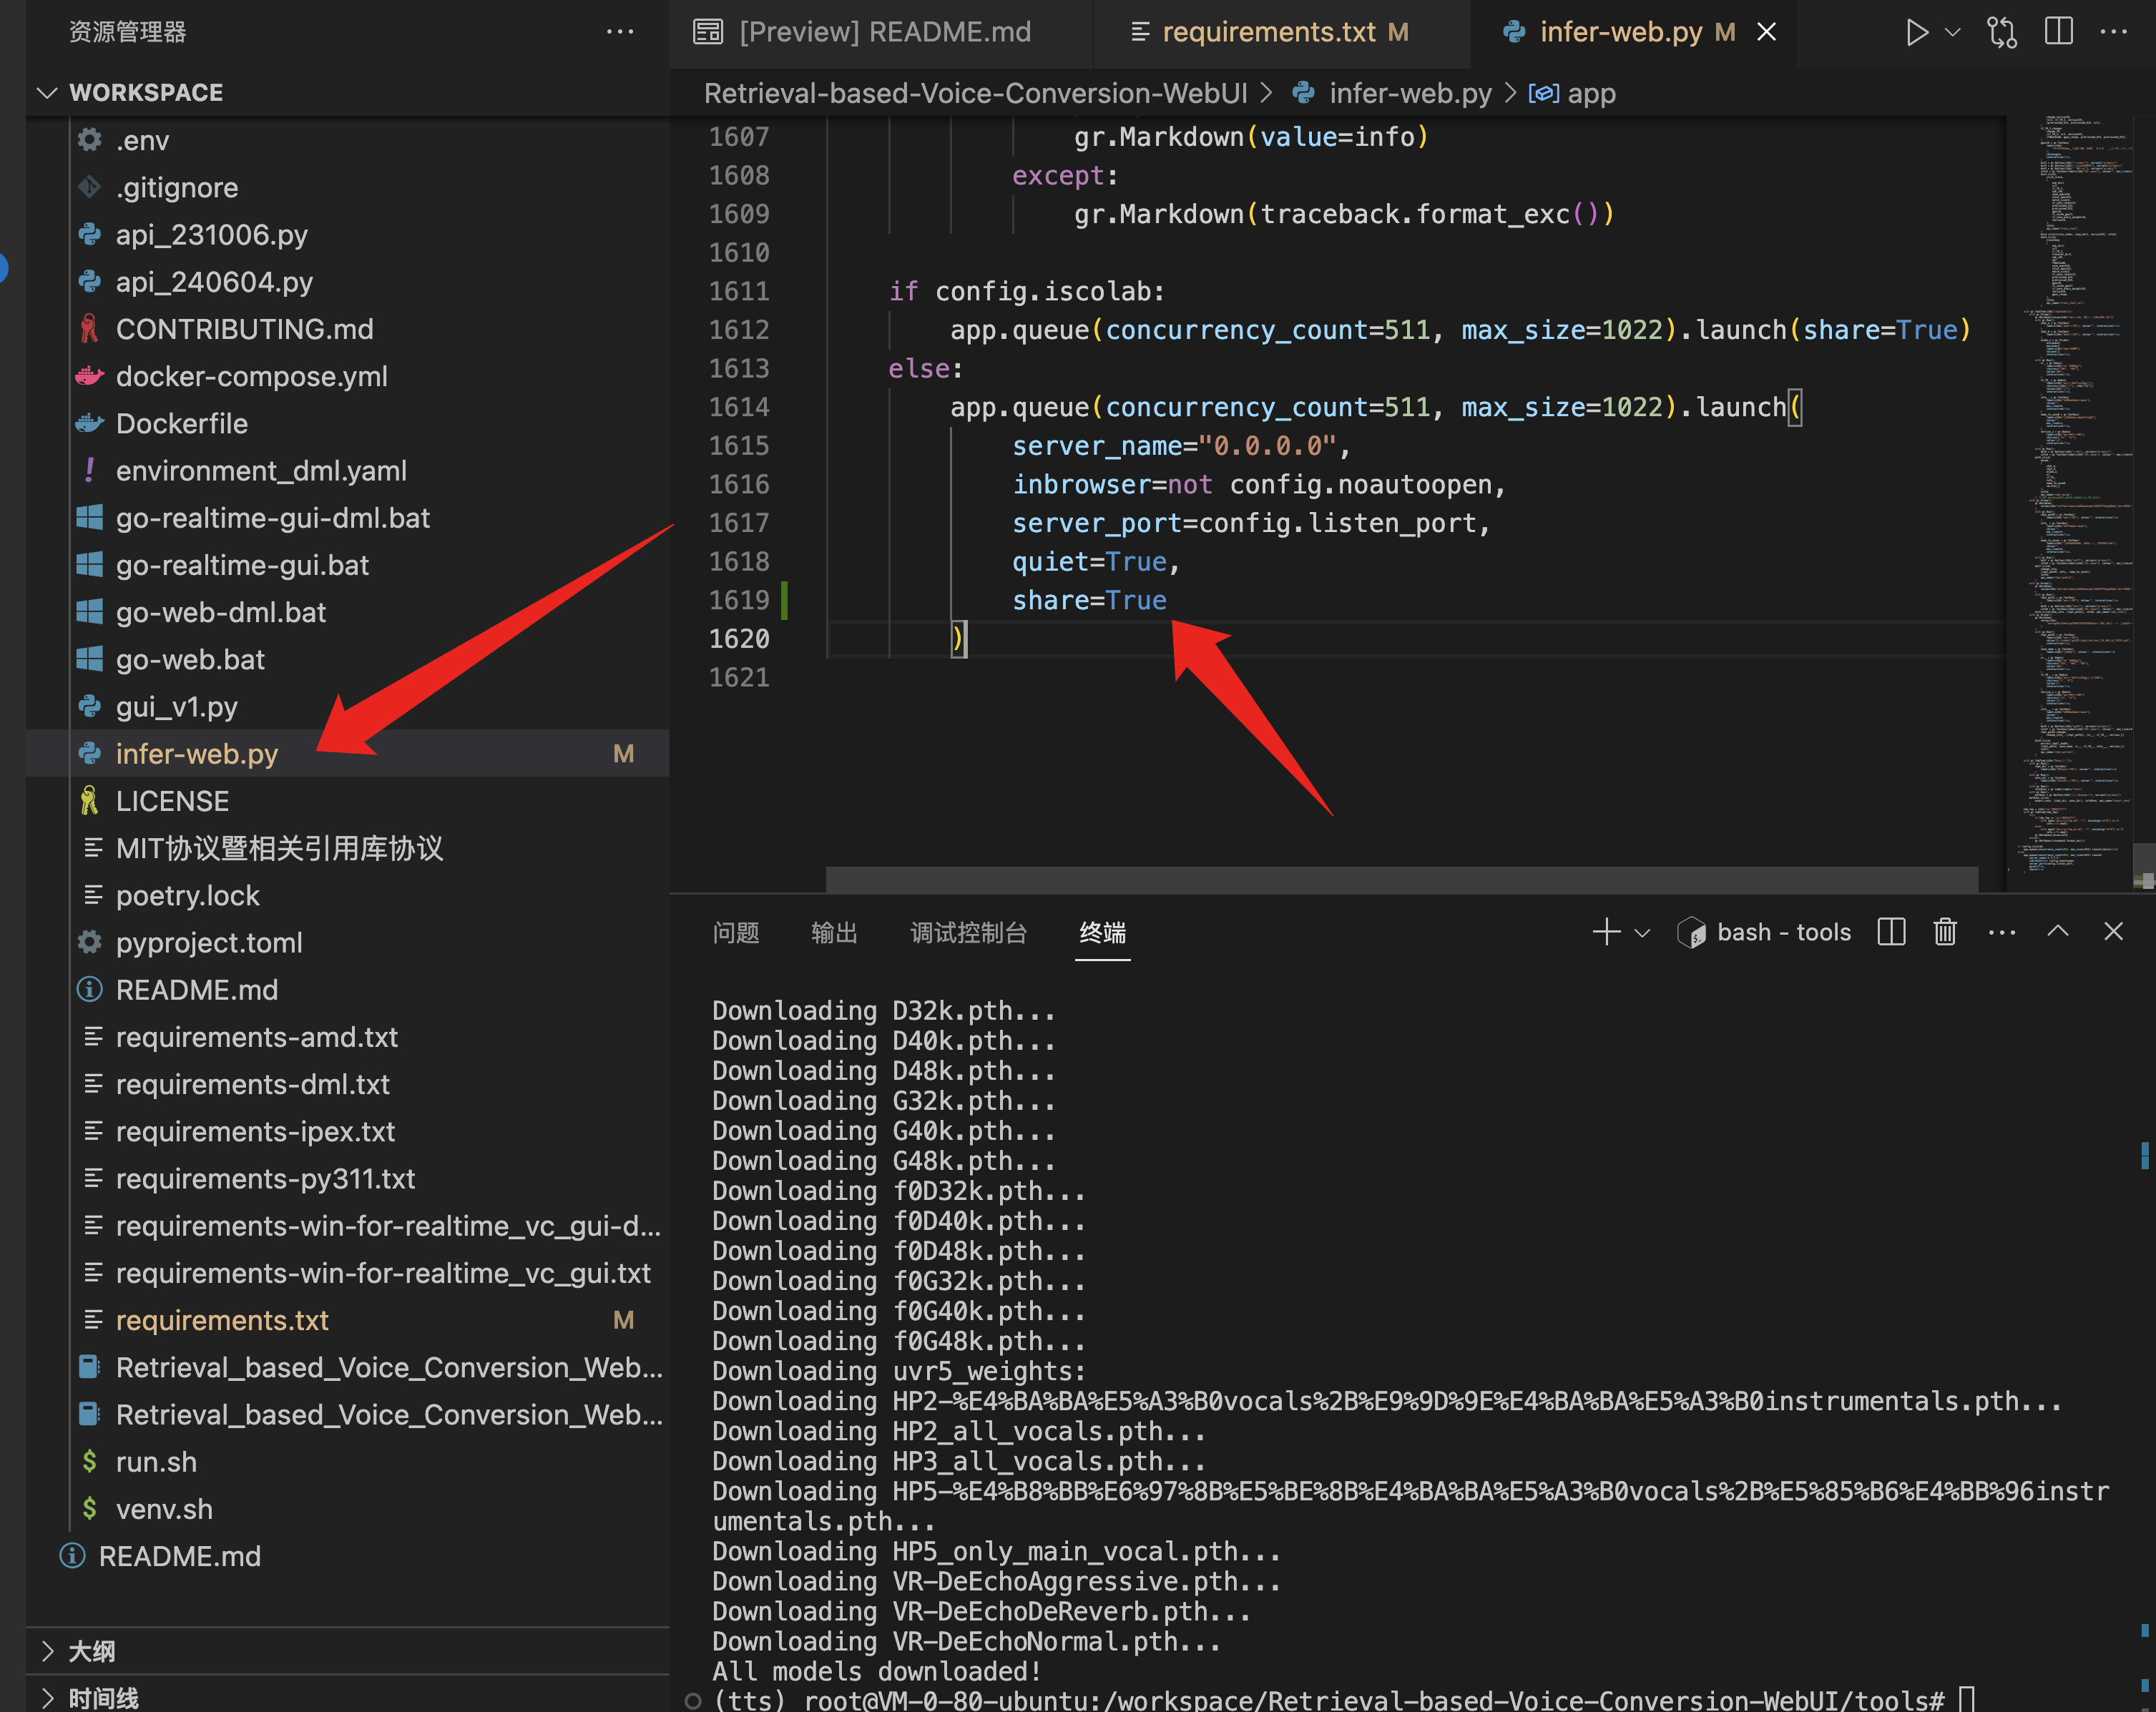
Find the infer-web.py file in the file tree, scroll to the bottom, and add share=True after 'quiet=True,':
Now, run the project with the following command:
cd .. && poetry run python infer-web.py
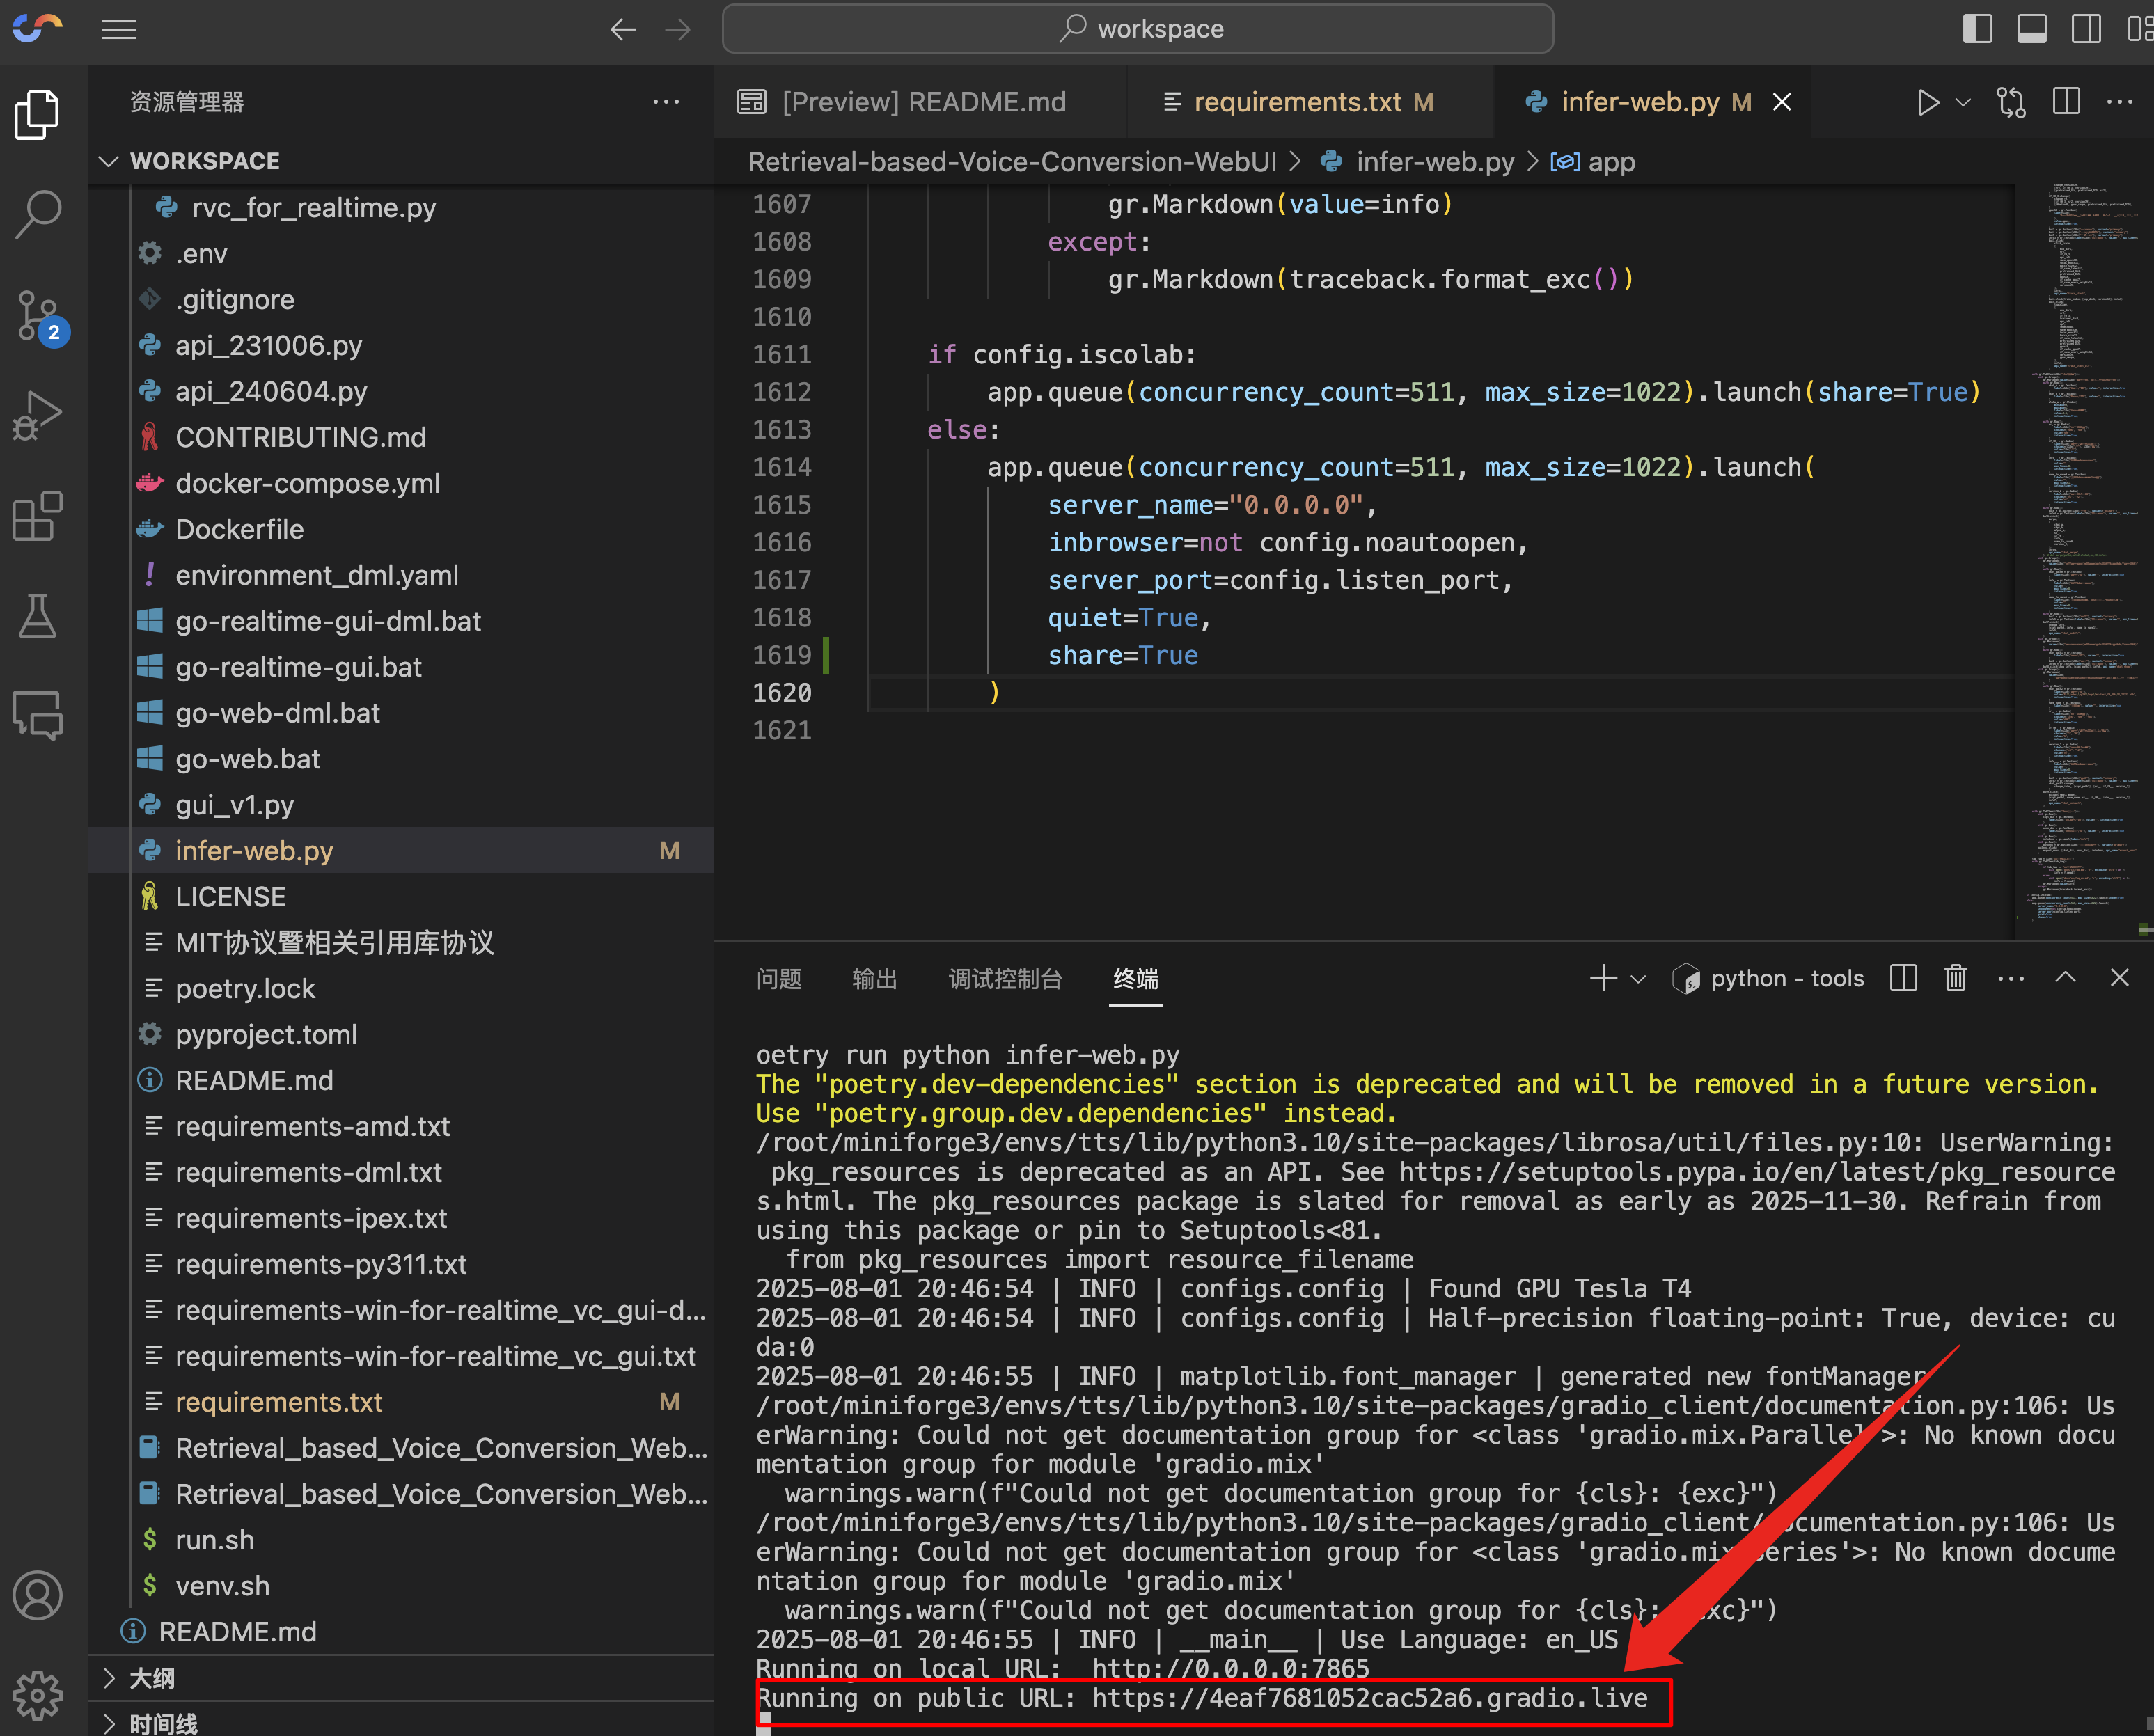
When you see the public URL indicated by the arrow, the project is running successfully. Copy the link and open it in your browser.
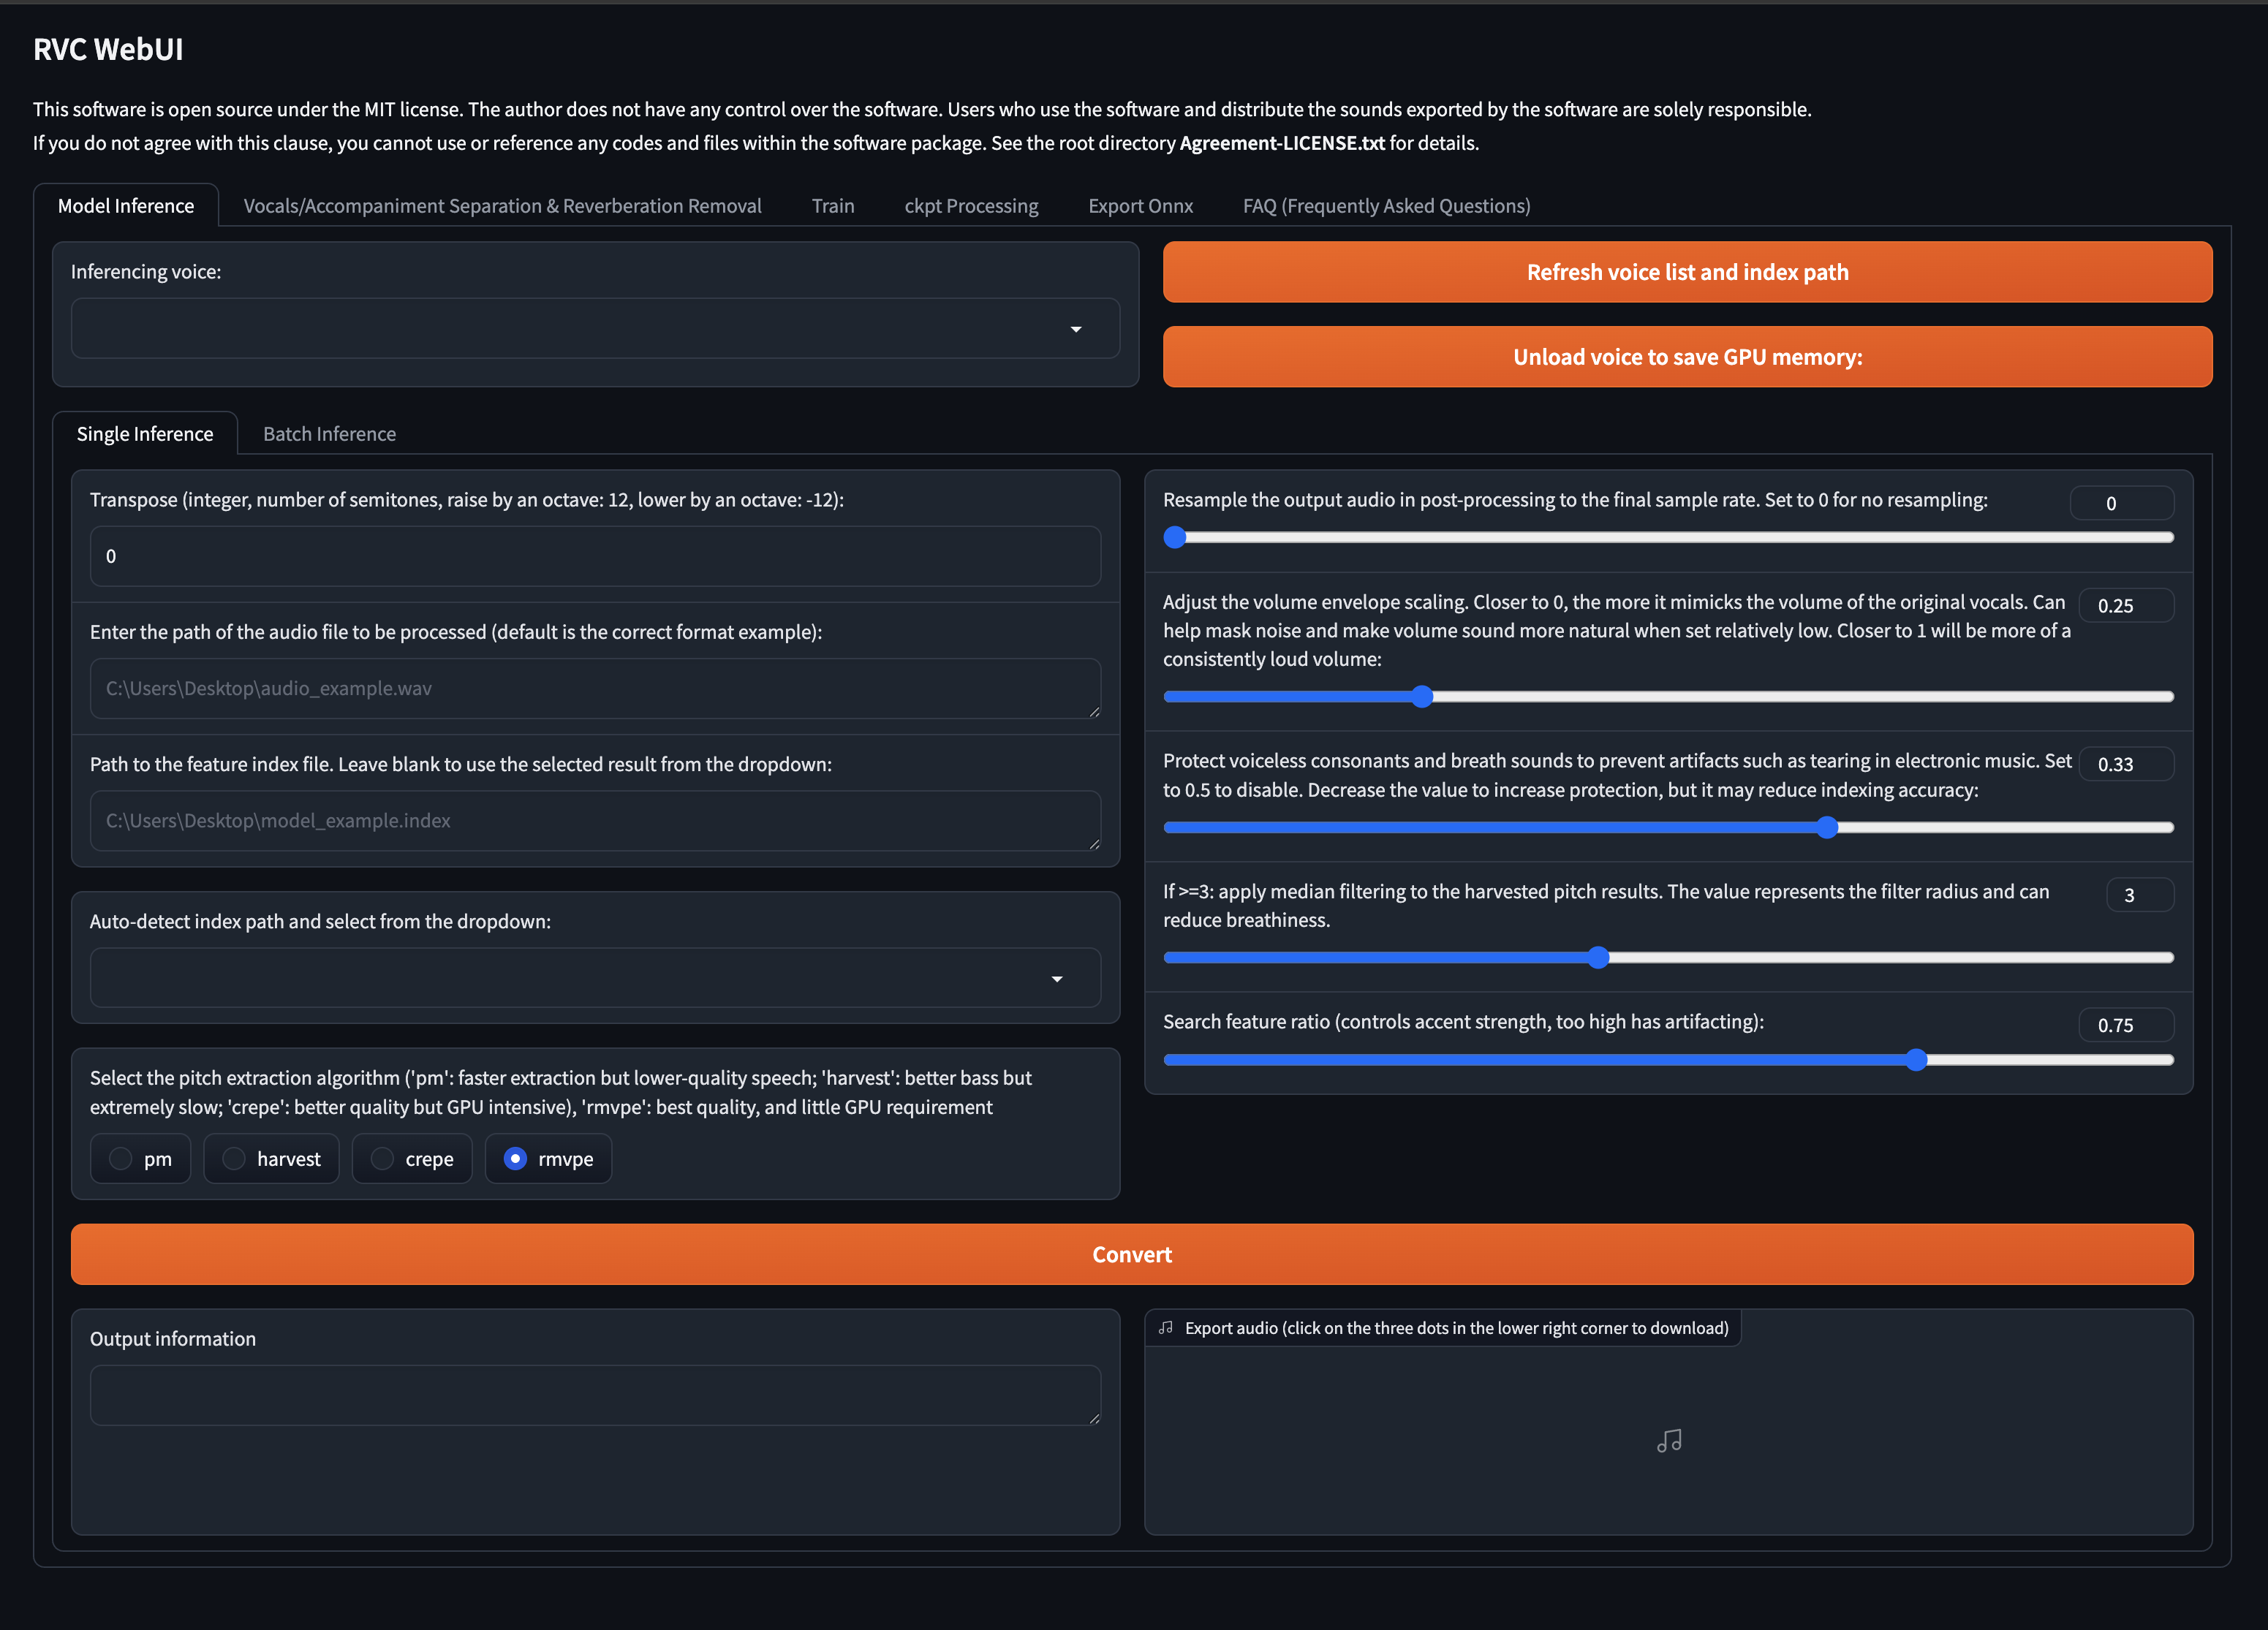
The rest of the process, such as uploading audio files for training and inference, is straightforward and not detailed here. The main challenge is getting the code to run in the CloudStudio environment.
Important Notes
The public URL provided by Gradio's built-in tunneling can be used for API calls, but it has a time limit and will expire. If you need a stable, permanent public URL, you can use other free tunneling solutions.